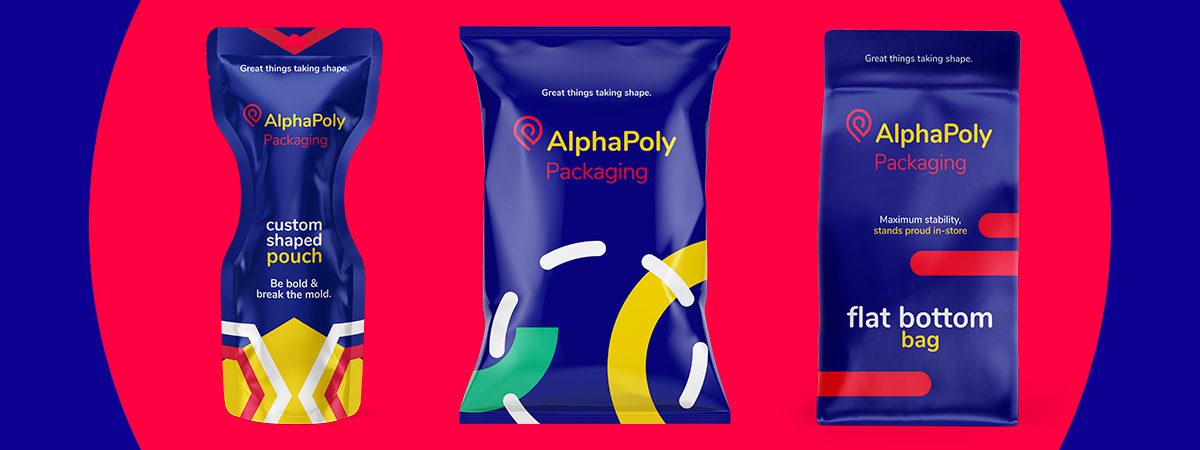
Flexible packaging is the new “it” thing in the CPG industry. Stand up pouches provide the vertical posture of a box without the added material or size. Resealable stand up pouches offer the added benefit of keeping products fresh even after the consumer has opened them.
But how do you print on stand up pouches? How does the ink stay on there without smudging? Which product information goes where since there are only three surfaces (front, back, and bottom)? What if you want a viewing window on your brand packaging?
Step 1: Branding and Labeling a Stand Up Pouch
As with any packaging, printing on a stand up pouch begins with design. Once you’ve determined the size of your packaging, you’ll have the specs to design to. Since there are only three surfaces, the information panel needs to go on the back of the package.
Once the package is designed, it’s good to have it reviewed to ensure proper spelling, accurate adherence to FDA regulations for labeling, and colour match.
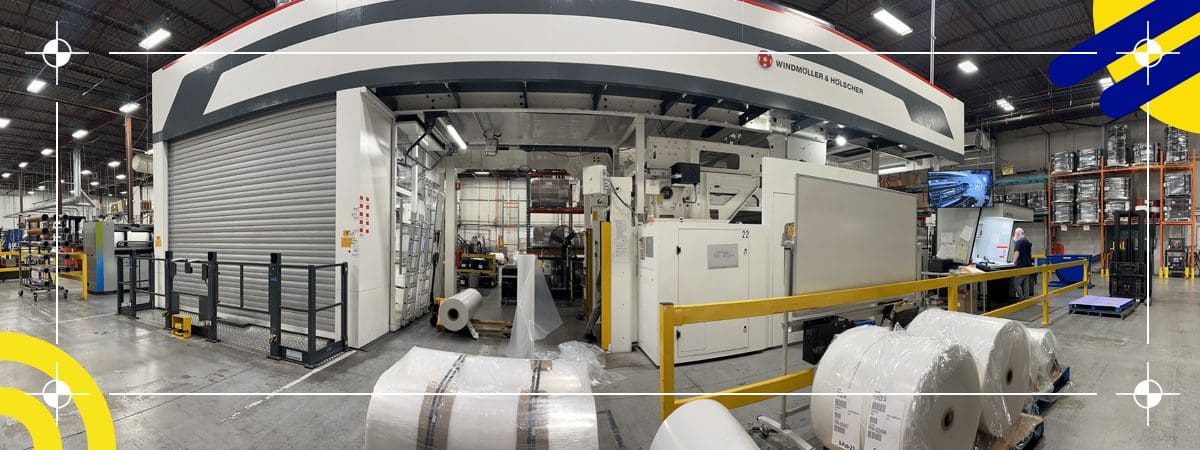
Step 2: Print Set Up and Stand Up Pouch Printing Options
There are three ways to print on a stand up pouch: digital printing, flexographic printing, and rotogravure printing. Each comes with its own set of pros and cons.
Digital printing is the best value for short print runs, but long runs become more expensive. You can achieve vibrant colours in relatively quick turnaround times. However, most toner-based digital presses cannot print a PMS color so it will simulate using Pantone to CMYK. You may have heard that digital toners fade more quickly in direct sunlight, but AlphaPoly uses UV resistant ink for outdoor application to prevent fading from the sun.
Flexographic printing has been around for decades, with improvements along the way. Essentially the set up for flexography involves creating polymer plates which are then attached to a roller. As a result, flexographic printers can print using a wide array of inks on a variety of types of surfaces. However, the print quality isn’t quite as crisp and direct as with rotogravure printing. Given the same size print run, flexographic printing tends to be less expensive than rotogravure.
With rotogravure printing, design images are engraved onto a copper cylinder, with each color requiring its own cylinder. This results in high resolution and crisp colours that appear more photographic. It does, however, work best on porous substrates, like magazine covers.
While rotogravure was the standard in flexible packaging for a while, flexographic technology has progressed so much that the quality could be argued to be equal to rotogravure.
As you can see, the print set up could be as simple as sharing a file or as complex as engraving multiple cylinders or creating polymer plates.
Step 3: Test Run
Before printing everything all at once, the printer should do a GMG. This allows you to see if the colours are correct, if alignment is accurate, and to make any last-minute information or spelling changes. It allows the printer to ensure the equipment is functioning optimally. With one final review, it’s time to proceed to the official printing.
Step 4: Printing
The printers will print on film stock selected by the customer.
Step 5: Processing and Converting
After the printing process is complete, there are a couple of additional steps that may be necessary to achieve your desired results. Laminating and curing help to protect the integrity of the print job throughout the lifetime of the package. Once those processes are done, the pouches are converted: front, back, and bottom. This is also the part of the process during which resealable zippers, degas valves, hang holes and other additional features can be implemented.
The packaging design and print process can feel overwhelming if you don’t encounter it everyday. Fortunately, there are companies like AlphaPoly that can walk with you from package design through delivery and every step in between. Let us know how we can serve you.